
Title
Elegant Butterfly Filet Crochet Table Runner – Full Pattern
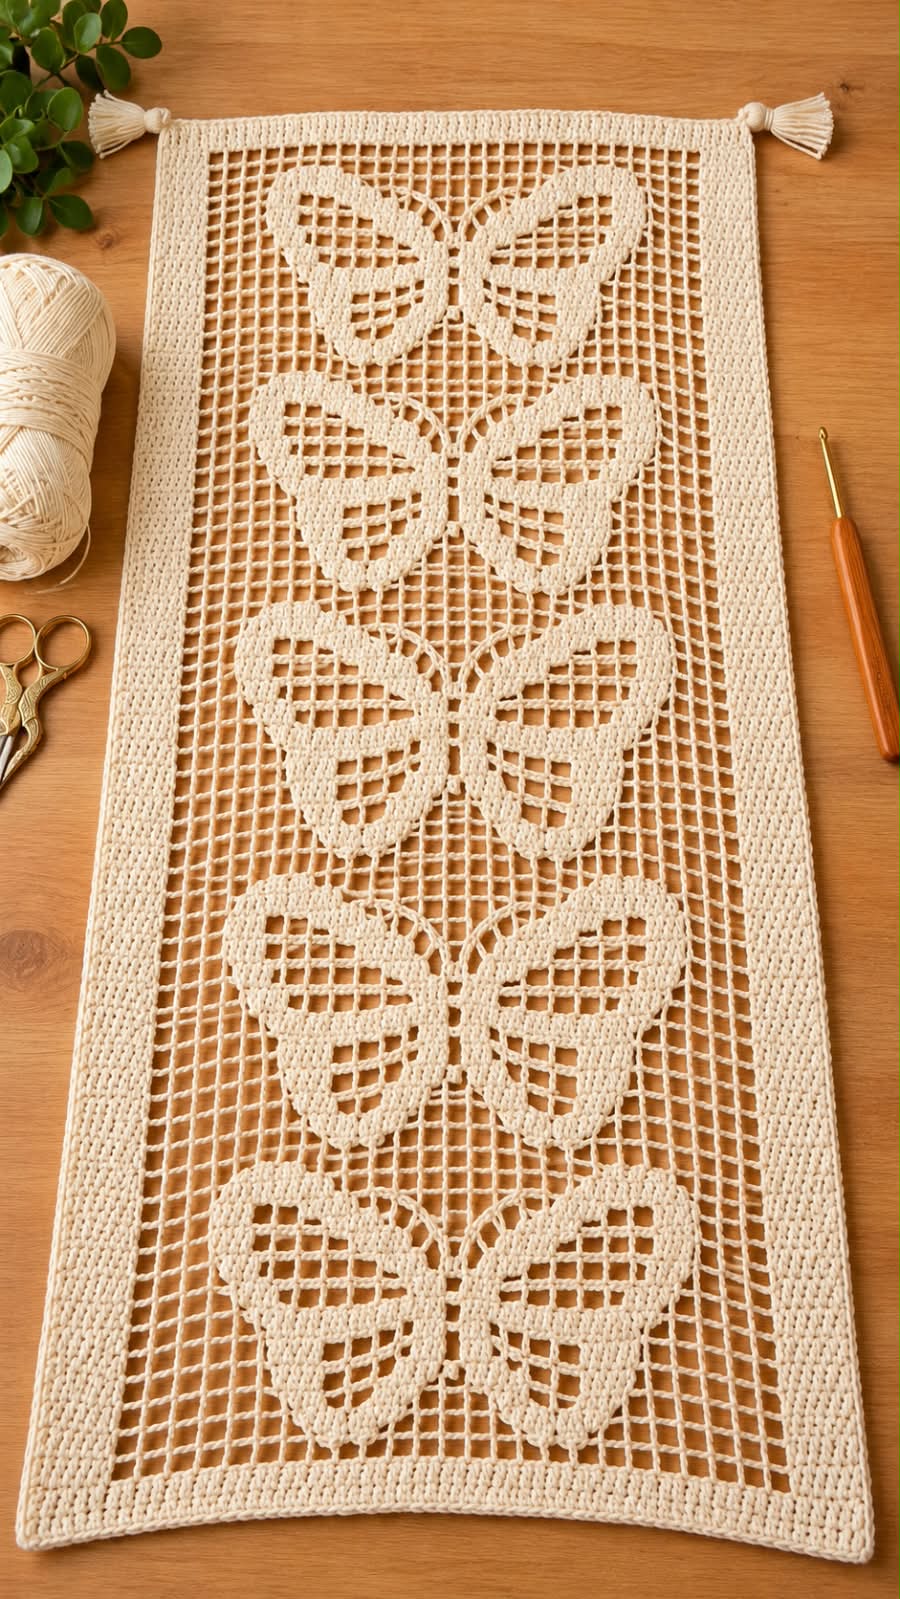
This delicate table runner features a long rectangular filet-crochet background with repeated butterfly motifs worked into the mesh.
The design includes:
- Five large butterfly motifs
- Open filet background
- Solid outer border
- Optional corner tassels
- Clean rectangular construction
The finished runner is light, elegant, and suitable for dining tables, coffee tables, dressers, or decorative wall display.
Materials
- Fine cotton crochet thread or lightweight cotton yarn
- Ivory, cream, or natural white
- Crochet hook: 1.75 mm to 2.5 mm
- Yarn needle
- Scissors
- Stitch markers
- Blocking mat
- Blocking pins
- Extra yarn for tassels
Skill Level
Intermediate
Crochet Abbreviations
- CH – Chain
- SC – Single Crochet
- HDC – Half Double Crochet
- DC – Double Crochet
- SL ST – Slip Stitch
- ST – Stitch
- SP – Space
- SK – Skip
- REP – Repeat
Approximate Finished Size
Width:
30–38 cm / 12–15 in
Length:
90–130 cm / 35–51 in
The final size depends on thread, hook size, and the number of butterfly repeats.
Method
The runner is worked in rows using filet crochet.
The design is based on two types of filet blocks:
Open Block
Work:
DC, CH 2, SK 2 ST
This creates one open square.
Filled Block
Work:
3 DC
A filled block replaces the CH-2 opening with 2 DC.
The butterflies are created by arranging filled blocks inside the open mesh.
Formation
Part 1 – Foundation
CH approximately:
121–151 stitches
The exact starting chain depends on your desired width.
A simple rule:
Use multiples of 3, plus the turning chain.
Row 1
DC in the 5th CH from hook.
CH 2.
SK 2 CH.
DC in next CH.
Repeat:
CH 2, SK 2, DC in next CH
across.
Turn.
Row 2
CH 5.
DC in next DC.
Repeat:
CH 2, DC in next DC
across.
Turn.
This creates the basic filet mesh.
Part 2 – Side Margins
Keep approximately:
3–4 open mesh blocks
along both long sides.
These open columns frame the butterfly motifs.
Part 3 – Butterfly Motif Structure
Each butterfly is centered in the runner.
The motif contains:
- Narrow body
- Two upper wings
- Two lower wings
- Antennae
- Open spaces inside the wings
The butterflies are repeated vertically.
Butterfly Body
Use filled blocks.
Work a vertical strip:
1–2 filled blocks wide
for approximately:
8–12 rows
This forms the central body.
Upper Wings
Begin on both sides of the body.
Increase the number of filled blocks gradually.
Suggested shaping:
Wing Row 1
2 filled blocks on each side.
Wing Row 2
3 filled blocks.
Wing Row 3
5 filled blocks.
Wing Row 4
7 filled blocks.
Wing Row 5
8 filled blocks.
Then begin decreasing.
Upper Wing Decrease
Work:
- 7 filled blocks
- 5 filled blocks
- 3 filled blocks
- 2 filled blocks
Return to open mesh around the wing.
Lower Wings
Start below the upper wings.
Work:
- 2 filled blocks
- 4 filled blocks
- 5 filled blocks
- 6 filled blocks
Then decrease:
- 5 blocks
- 4 blocks
- 2 blocks
Keep both sides symmetrical.
Open Wing Details
Inside some filled wing areas, replace selected blocks with open blocks.
Use:
CH 2, SK 2, DC
This creates the decorative holes visible inside the butterfly wings.
Antennae
At the top of the body, work two narrow diagonal lines.
Use single filled blocks separated by open spaces.
Approximate sequence:
1 filled block
Shift one block outward on each new row.
Repeat for:
3–4 rows
This creates two antennae.
Part 4 – Butterfly Repeat
Leave approximately:
4–6 plain mesh rows
between butterfly motifs.
Repeat the full butterfly design.
For a runner similar to the reference, make:
5 butterflies
arranged vertically.
Suggested Sequence
Work:
- Bottom mesh margin
- Butterfly 1
- Mesh spacing
- Butterfly 2
- Mesh spacing
- Butterfly 3
- Mesh spacing
- Butterfly 4
- Mesh spacing
- Butterfly 5
- Top mesh margin
Part 5 – Outer Border
Once the filet panel is complete, work around the entire rectangle.
Border Round 1
Join yarn at one corner.
CH 1.
SC evenly around.
At each corner work:
3 SC
Join with SL ST.
Border Round 2
CH 3.
DC in every stitch.
At each corner work:
2 DC, CH 2, 2 DC
Join.
Border Round 3
CH 1.
SC in every stitch.
At each corner:
SC, CH 2, SC
Join and fasten off.
Optional Decorative Border
For a slightly softer edge:
Work:
SC, CH 3, SK 2 ST
around.
At each corner use:
SC, CH 5, SC
This adds a light lace finish.
Part 6 – Corner Tassels
Make four small tassels.
Cut approximately:
20–30 strands
for each tassel.
Each strand:
15–20 cm
Fold in half.
Tie tightly at the fold.
Wrap yarn around the tassel approximately:
1–2 cm below the top
Trim evenly.
Attach one tassel to each corner.
Optional End Tassels Only
Instead of four corner tassels, you may attach tassels only to the two short ends.
This gives the runner a cleaner look.
Length Adjustment
To make the runner shorter:
Use fewer butterfly repeats.
For example:
3 butterflies
To make it longer:
Add more complete butterfly sections.
For example:
6–7 butterflies
Width Adjustment
To make the runner wider:
Add extra open mesh columns to both sides.
To make it narrower:
Remove the same number of mesh columns from both sides.
Always keep the butterfly motif centered.
Blocking
Blocking is essential for filet crochet.
Lightly wet the completed runner.
Lay it flat on a blocking mat.
Pin:
- All four corners
- Long edges
- Top and bottom edges
Stretch gently until the mesh squares are even.
Make sure:
- Butterflies are centered
- Wings are symmetrical
- Border remains straight
Allow to dry completely.
Finishing
Weave in all loose yarn ends.
Trim excess fibers.
Check that the filet squares are even.
Straighten the border.
Trim tassels to equal length.
Conclusion
This butterfly filet crochet table runner combines classic open mesh with decorative butterfly motifs for a light, elegant handmade design.
The repeating filet construction makes the pattern easy to customize in both length and width.
The same butterfly motif can also be adapted for:
- Curtain panels
- Wall hangings
- Tablecloth inserts
- Dresser scarves
- Decorative lace panels
- Handmade gifts
For the best result, maintain even tension throughout the filet mesh and block the finished runner carefully so every butterfly remains crisp and symmetrical.