
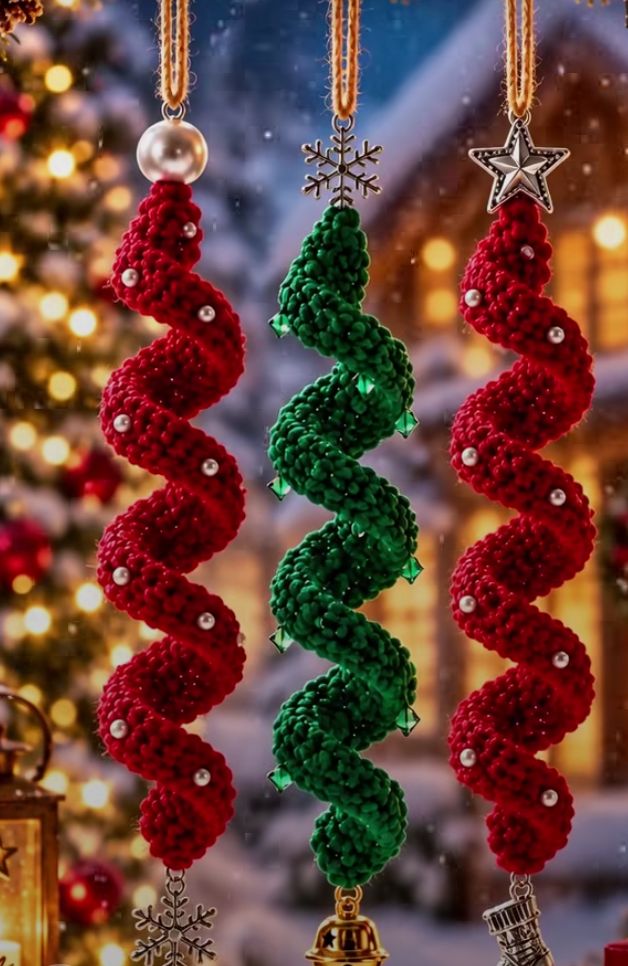
Pattern Note
The reference photograph shows finished ornaments but does not reveal the exact original stitch counts or construction method. The instructions below are an original interpretation designed to create a similar three-dimensional spiral effect.
Materials
Medium-weight cotton or acrylic yarn in red, green, cream, or another festive color
3.5-4.5 mm crochet hook, adjusted to suit the yarn
Yarn needle and scissors
Twine, ribbon, metallic cord, or crocheted chain for hanging
Optional pearl beads, faceted beads, bells, snowflakes, stars, or other lightweight charms
Finished Size
Approximately 28-38 cm (11-15 in) long, excluding the hanger. Length and fullness vary with yarn, hook, foundation-chain length, and stitch count.
Abbreviations – US Terms
ch = chain; sl st = slip stitch; sc = single crochet; hdc = half double crochet; dc = double crochet; st(s) = stitch(es); FO = fasten off.
Main Spiral
1. Foundation Chain
Ch 75-95 for a medium ornament. Use about 55-65 chains for a shorter ornament or 100-120 chains for a long statement piece. Keep the chain relaxed.
2. Create the Corkscrew
Beginning in the 3rd ch from the hook, work 3 dc in each chain across. Allow the strip to twist naturally as you work. For a denser, more dramatic curl, work 4 dc in each chain, or alternate groups of 3 dc and 4 dc.
3. Optional Textured Edge
For extra definition, join yarn at one end and work a light edging along the outer curve, such as 1 sc in each available stitch. This is optional, especially with textured yarn.
4. Shape the Spiral
FO and weave in the tail. Hold the ornament from the top and gently guide each curl so the turns travel in the same direction. Adjust individual sections with your fingers rather than pulling the whole piece.
Beads and Pearls
Sew small pearls or faceted beads onto selected outer curves after crocheting. Spacing an accent every second or third curl gives a festive effect without hiding the stitch texture. Secure every bead carefully.
Hanging Loop
Attach a 15-20 cm (6-8 in) length of twine, ribbon, metallic cord, or a crocheted chain to the top. Fold it into a loop and secure it firmly. A large pearl, star, or snowflake charm can be placed between the crochet and the hanger for a decorative finish.
Bottom Charm
Attach an optional lightweight bell, snowflake, or other Christmas charm to the lower end with sturdy thread, a small loop, or suitable jewelry hardware. Avoid heavy pieces that could stretch the crochet.
Variations
Tighter spiral: use 3-4 hdc in each foundation chain.
Fuller spiral: use 4 dc per chain with a slightly larger hook.
Chunky version: use thicker yarn and shorten the foundation chain.
Elegant version: deep red yarn with pearl accents and gold-toned cord.
Evergreen version: dark green yarn with clear faceted beads and a snowflake charm.
Minimal version: omit beads and let the sculptural spiral be the main feature.
Finishing
Weave in all ends securely. Do not press the ornament flat. If shaping is needed, lightly dampen or steam from a safe distance, arrange the curls by hand, and let the piece dry while hanging.
Quick Pattern Summary
Ch 75-95. Starting in the 3rd ch from hook, work 3 dc in every ch across, or 4 dc in every ch for a fuller curl. FO, shape the corkscrew, add optional beads, attach the top hanging loop, and finish with optional Christmas charms.
Making a Coordinated Set
Make several spirals with the same yarn weight and starting-chain count so their proportions match. A set of two red ornaments and one green ornament closely echoes the festive composition in the reference image. Vary the charms while keeping the hanger style consistent.
Original image-inspired crochet guide. The reference photograph is not embedded in this document.